Sunday, November 16, 2014

One Leg at a Time

It's like welding.  Or carpentry.  It's just assembly, except instead of wood and glue, the materials are twill and thread.  Anyway, I don't need to justify myself to you, dear reader, by now you must know that I can't help but do for myself what might easily be done for me.  Case in point - PANTS.

I've been playing around with the new sewing machine I got for Shannon last Christmas and eventually some web surfing led me to www.threadtheory.ca.  Let me tell you, though self-making is a growing trend and online instructions are an amazing resource in the Information Age, men's sewing patterns lag far behind, remaining an obscure cul-de-sac off the information superhighway.  The good folks at Thread Theory are working to change that, producing some amazing patterns, instruction, and encouragement all in order to help poor saps like me find my way to a new pair of pants.  One leg at a time.

The pattern I selected for this first run was their new Jutland Pant, a straight-leg, relaxed fit pant that would be suitable for a heavy work pant, a jeans pattern, or even an outdoor waterproof hiking pant if someone was determined to hike in the rain.  I decided to make mine a kind of wearable muslin in a green twill with a gold facing fabric.  I have some selvage denim I have been holding onto for a bit, trying to build up skill and courage to do a couple pair of jeans.  I figured the Jutlands would be a good pants primer, and the clear instructions and pictures didn't disappoint.

I failed to document any of the process, which mostly involved late nights huddled over the sewing machine, thread and fabric bits slowly piling up around me, and occasional beer breaks while I puzzled over each step.  It took several days of on-again off-again effort, but the finished product turned out great!  The pattern includes several cool options, like reinforcements for the knees and hem, cargo pockets, etc.  I went with cargo pockets and the knee bits, and had to shorten the length of the inseam (of course) and grade the pattern for my size.

There were some challenges, too.  The flat-felled outseams turned out well, but then trying to run the top-stitches on the inseam after the leg was closed was a trial, to say the least.  Topstitching in general was always a little bit of a finicky operation, but I am overall pleased with the results.  The fly construction was a learning process, and though I was able to muddle through, I learned enough that the next run at that operation will no doubt be better.  And I had to make some alterations to the pattern, like raising the knee patches so that I they lined up on my knees and not on my shins (which meant that they fell further up the taper on the leg, which meant that the edges didn't extend far enough for the flat-fell seam, which meant the seam had to be pressed from the back to the front).  Learning to anticipate the ways in which pattern changes have downstream repercussions is part of the continuing education.

These are very wearable, and should hold together well as the construction, based upon Thread Theory's excellent guide, is very solid.  I have a shirt project to put together, but the Jedediah Pants at Thread Theory are high on the to-sew list, and I'll start studying that pattern soon enough.  Anyone wanting to stitch a pair of these together before the holidays would do well to visit the Thread Theory page and jump onboard with their Jutland Sew-a-Long, scheduled to start Dec. 1!


Saturday, March 8, 2014

New Home Construction

Spring is trying to break through, it really is.  And in anticipation of it I have been busy building boxes for bees.  Though I have utilized Top Bar hives in the past, I am changing my equipment over to Langstroth hives, for the most part, and keeping only a few Top Bars here and there for fun.  Since I have ambitions for a LOT of hives in the near future, I have been working on production methods for the new hives so I can turn out eqquipment on the cheap and when necessary.  Here's a look at five boxes and some other bits as well.

First off, we start with 1x8 pine lumber.  I grabbed four 8'ers from the local big box store and got enough for 5 medium supers, with just a few bits left over.  I like working as efficiently as possible with materials, and this counts as a win for the good guys.

After basic dimensioning, including rips and cross cuts, I run the pieces through the table saw using my handy-dandy box-joint jig.  I made this thing a few weeks ago, it works like a champ.  The ends get milled to fit together at the corners in a very strong joint that will eventually get glued and nailed.  I like working with sled jigs, they allow for some real fine-tuning and keep fingers safe when working with the saw.  I set the table saw up with a 3/4" dado blade and away we go.  You can see the stack of sides adding up.

A rabbet along the short sides is required to create a ledge that will hold frames eventually.  I use the stacked dado and created a custom top-plate for it using some oak scrap laying around the shop.  It is a cool little accessory, fits the table perfectly.  Cutting the dado on the short side, as well as planning the joint correctly, means that I can make the dado cut across the whole length, rather than stopping it and squaring out the cut.  Don't know why people bother with that, but plan after plan seems to suggest that route.

The sides then get glued up and assembled.  It's important to keep the boxes square, so I utilize no small number of clamps, including a 90 degree corner clamp and then some long ones to draw the joints together.  There are 32 nails per box, these things are not falling apart anytime soon.  But then again, they have to endure the elements as well as handle the weight they will carry when full of bees and honey.

Good jig design and careful layout means that I can bust out tight joints quickly and with regularity - it's a nice thing.

One of the little touches that I like on commercial boxes are the scalloped handholds that are set into the sides.  So I did a little research and found a handy design that can get a similar result using a skill saw.  It mounts to the finished boxes and cuts the handholds pretty neatly.  Not bad.


Making boxes is just one part of a whole hive.  Each box holds 10 frames, which the bees will use to build their comb on.  I got a bulk package with pieces for 100 frames, they have to be assembled one at a time.  But the pieces are all coming together, and soon spring will be here and all the separate bits will combine for a productive whole, much like the colonies they will house.  Looking forward to it!


Sunday, December 8, 2013

Goings on

New goings on at our affiliate blog www.harvestingathome.net where you can read all about our new book. That's right, a book, complete with all the bells and whistles! It has pages, and covers (both front and back), comes with pictures, text, and even a table of contents. Hard to beat all of that value packed into one little package! Anyway, go check out the new thing!

Monday, April 15, 2013

Shear Joy

One of the things I have noticed is that the cultural distance from activities that were once commonplace in human society has resulted in a powerful mystification of otherwise mundane tasks.  When we decided to harvest our own pigs last year, we found ourselves piercing through layers of mystery that have been erected between the average meat consumer and the source of their food.  Butchering meat, once a household skill, is now arcane knowledge, kept by disciples in white lab coats who pass quietly behind swinging doors.  What happens behind those doors?  Who knows, certainly no one in polite society should like to find out - instead, we are content to be handed individually wrapped portions, developing our specific tastes and preferences with little to no consideration of the whole from which it comes.  Even among those who raise pigs, harvesting and butchering is most commonly left to the professionals.  When striking out on our own, we found that we were flying in the face of what is now conventional wisdom.

In the same manner, when I began this new venture of raising sheep, one of the tasks that every shepherd would have taken upon him or herself is the annual need to shear the woolies, ridding them of their thick fleeces in time for lambing season and the warming of spring.  But, similar to changes in most other areas of agricultural life, when sheep raising moved from smallholdings to vast herds in corporate operations, tasks that would have been achievable by a small community were put into the hands of professionals and specialists.  And now, even among smallholders, the instinct is most often to call a professional shearer (a profession growing more rare every year) to schedule a haircut for the sheep at what one hopes will be a reasonable price per head.  For those wishing to try their own hand at it, the industrial model (using expensive mechanical shears) tends to maximize efficiency over the comfort of the animal - as a result, one gets the impression that the only good way to shear a sheep is to get it done as fast as possible.

There are other ways to do this.  Traditionally, shearing was done comfortably and peaceably using hand shears and some patience.  The goal, rather than emphasize efficiency of time, is to work well with the animal and to get a quality fleece for fiber work later.  Often these skills were learned on the job, under the watchful eye of a skilled shepherd, but in the Information Age, recommendations on tools and approaches are just a click away, and after research is done all that is left is to give it a try.  There is an old Russian saying that translates: "Repetition is the mother of learning."  - my aim was to learn to shear our own little flock, using the five sheep as five lessons in shearing.

My brother Alex had put me on to some hand shears that seemed like they would do the job right.  They are called Jakoti Shears, and let me tell you, they are, as they say in the east, "wicked shaap", they are extremely comfortable to use, and they hold an edge like you wouldn't believe.  Although they are made as garden shears, I would recommend them as a more than adequate tool for the task of shearing. They are manufactured in the UK but carried by several dealers in the US.

I started first with the lambs, and began figuring this whole thing out.  In some ways, it is just a haircut of sorts - but there are some tricks that make it work better for man and beast alike.  In order to make shearing possible, the sheep is flopped onto their backside and leans against the legs of the shearer.  In this position they are completely docile, even slipping towards sleep every once in awhile.  What follows is a kind of greco-roman wrestling match, as the sheep is gently rolled around to different positions in order to get the angles best suited to cutting wool and not flesh.  That distinction is harder to maintain than one would at first imagine - the wool is so dense, and the flesh so soft, that the line between them is sometimes difficult to discern by eye or even by touch.  But there is a feel to the thing that develops in a short amount of time and though we had to administer some minor first aid care to the long-suffering sheep, no major cuts were inflicted.

Keith and I worked our way through the first two lambs and our cutting technique began to improve.  A week later I did two more yearlings, and got pretty decent looking fleeces off both.  And finally, I turned my attention to "Mama", our bred ewe (due in June), with her impressive shaggy coat.  The lambs were easy to move around, but Mama was a different story.  Just getting her in the shed and onto the working platform we built was a challenge and it made me think about what kind of system we would need to develop next year when our flock was more fully grown.  But eventually she and I worked things out and she sat back and relaxed for her trim.  Thirty minutes later, she emerged with a daring new look, and I was able to take some pride in a beautiful and intact fleece.

The fleeces are getting washed, then the plan is to send them off to a local fiber mill for processing.  Our plan is to get a bunch of yarn back and put them to use in some knitting projects, that kind of thing.  Hopefully we'll have a lot to work with, and can hand some out to talented knitters and see what they can do!  Meanwhile, lambing season approaches and all the new learning that will come with it - Mama is ready, now, for an easy time of it with her new, sleek spring outfit.  The curtain has been pulled back, the great and powerful Oz has been exposed - shearing is a task well within the grasp of any that would care to learn to do it.  For me, there was a recognition that this ritual, a Scotsman shearing his sheep, has been repeated countless times through the ages - and I am glad to continue on in the tradition.   


Sunday, March 3, 2013

For Pet or Dinner

It was possibly the worst Craigslist ad I have ever seen.  
It read, simply: "Lambs: For Pet or Dinner.  $50."

A stock picture of some sheep, no contact information save a generic craigslist reply.  It looked bad.


 My partner in crime at the farm is my friend Keith.  He e-mailed me the ad, along with some skeptical side comments.  The Yakima Valley has some pretty sketchy farm outfits, and unfortunately that sometimes means that you see livestock dumped on the internet, oftentimes they come in questionable health and are raised in even more questionable conditions.  We had been keeping our eyes out for some sheep in order to start up a small flock that we want to keep at the farm - this didn't seem like a very likely answer to our hopes.


But still....it was worth at least a reply e-mail right?  So I shot off an e-mail that had a couple of questions in it and my phone number.  An hour later I got a call and all concerns were laid aside.  We had hit the jackpot.


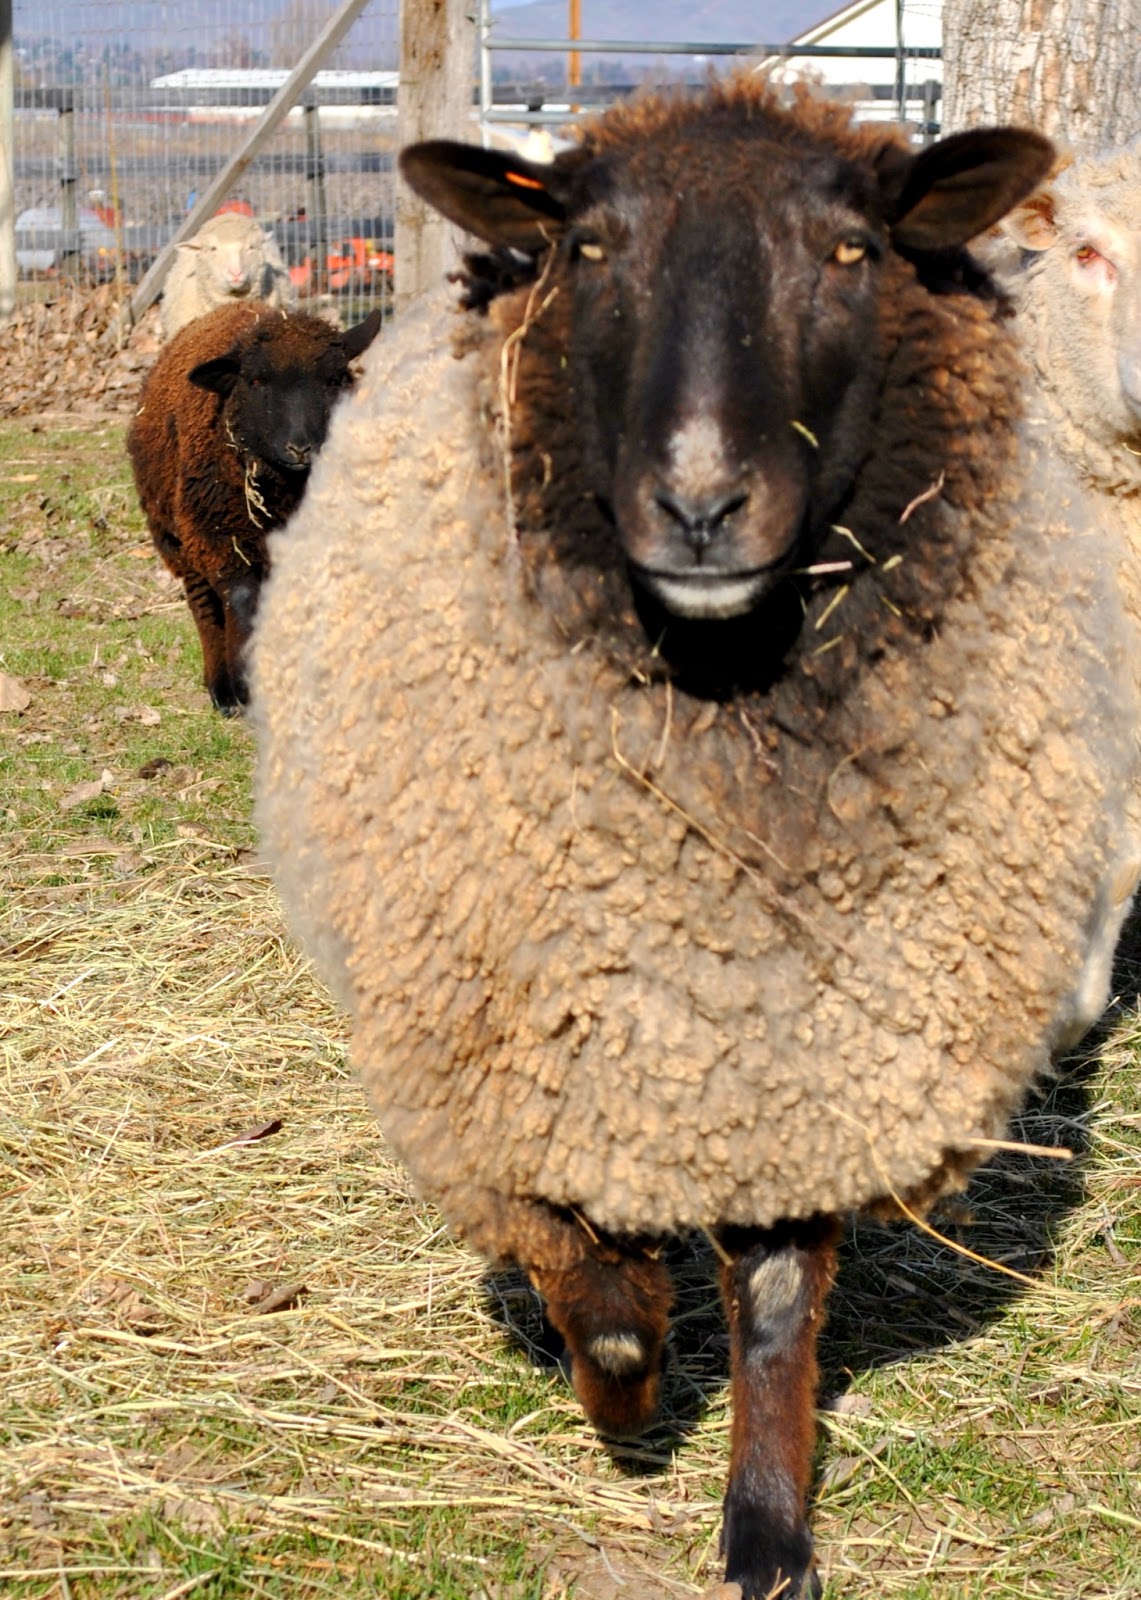
I'm grateful that the owner of these beautiful sheep had asked her adult son to place a craiglist ad for the sheep....and I'm grateful that he put almost no effort or thought into it.  What we found was an absolutely beautiful farm home to absolutely beautiful sheep - 60 head of Cormo, which were managed for their wool.  The lambs were 8 months old or so, in perfect condition.  It didn't take much chatting to find that the owner was more than happy to be selling the sheep to some young families with an interest in getting started and soon we were talking about what we would be able to take home.


We ended up agreeing on four sheep - three lambs (2 ewes and a wether) and a pregnant ewe that was due in June.  This would give us a nice starter flock to work with.  I put money down on the spot and arranged to pick up the sheep later in the week, giving us time to get the farm ready for their arrival.  We had a couple of fencing issues to address, a shelter shed to get ready (the resident horse had moved out several months earlier) and a few other sundry details to attend to.  When we arrived to pick up the sheep, the owner gave us an additional ewe as a "bonus"....and so we came home with five beautiful, wooly creatures.
We were told it would take a little while for them to warm up to us.  It took about 4 hours and a  handful of grain.  The sheep are a fantastic addition to the farm - they seem to love their new accommodations, they follow us around as we work, and their wooly fleeces hold the promise of all kinds of projects in the year to come.  In just a few months we will happily add more to their number as the pregnant ewe delivers at least one (maybe two!) little ones to add to the happy crew.

So, this MacLeod is standing in the footsteps of his ancestors.  A tender of flocks, a mender of fences, and a shoveler of #*@!.  All transferable skills.  Say hello to the golden parachute - it's a woolen parachute, which means it still insulates, even when wet.  Just be careful how you wash it.

Chewy - our wether.
Lily - the shy one.

Mama - bringin' the babies.
Cuddles - truly tame.

Cocoa - our bonus lamb.


Friday, November 30, 2012

Bringing Home the Bacon

We recently came into a significant inheritance of sorts - about 200lbs of pork resulting from the harvest of the pigs we raised this past year.  Some of that meat comes in ready-made and recognizable cuts that can be used immediately in the kitchen.  Others portions invite additional processing in order to bring out the best.  What follows are a couple of our recent adventures in curing and smoking.

When a pig is harvested, one of the biggest tasks is to get all of that meat packaged and stored.  Most of it can be vacuum sealed and stored in a freezer until ready to use (one of the great conveniences of pursuing an old task in a modern age).  But other cuts can be preserved using other methods, like curing, which will not only save freezer space but will also produce some of the very tastiest stuff we associate with the noble pig.  The primary text I've been using as a guide to this process is Ruhlman and  Polcyn's Charcuterie: The Craft of Salting, Smoking, and Curing

The belly is one of those cuts that benefits greatly from various cure treatments.  These large slabs are a wondrous mix of tender meat and silky fat and it is here that we look for bacon.  Yes, bacon....take a moment if you need to.  This past year the world did a collective shudder as it contemplated the mere possibility of a bacon shortage - a truly terrible thing to consider.  To transform the fresh pork into salty, smokey goodness, a slab of belly is first covered with a cure.  This is a mix of salt, sugar, spices, and often (though not always) some special curing agents that protect the meat from developing certain kinds of dangerous bacteria.  The meat is then put into a large ziplock bag and placed in the fridge, where it sits in the resulting brine that leaches out.  After a week and a bit, the slab is removed and rinsed off, then allowed to dry in a fridge for about 24 hours - this preps the meat for smoking.

I prepared four large slabs of belly in basically this manner, although one slab was destined for the garage rather than the smoker (it being turned in to pancetta, the subject of a future post).  When ready, they were put into the smoker and cold-smoked for several hours over smoldering applewood chips, then transferred to the oven where they were cooked to an internal temperature of 150F.  Voila!  Bacon!  We now have more bacon that I know what to do with.....well....actually, I'm pretty sure of what to do with it.

Another great cut for curing is the ham.  This comes from the hind leg quarters and can be a large cut.  This can be cured in several ways, some roads leading to tender, sweet ham, other, longer journeys resulting in prosciutto.  I decided to debone our hams and then submerged them in a brine for about two weeks.  They sat out in our garage, protected by salty brine and cool temperatures, as they underwent a flavorful transformation.  After this, they, too, sat uncovered in the fridge to dry, then off to the smoker where they were exposed to applewood smoke for about 5 hours.  We finished them in the oven to 150F.  These hams make a fantastic feature for a big meal, the smoke flavor is superb.  You can also put them through a slicer, particularly convenient because they are boneless, and turn out your own packages of deli meat.

The quality of the product that can be produced in your own kitchen is really astounding.  The flavors are amazing - this is work that pays dividends on the time and attention given to it.  We are now able to find quality deli meats and gourmet bacon a few steps away from the kitchen, tucked safely in the freezer.  And bacon and ham are just the tip of the porkberg, so to speak.  Pancetta and guanciale are curing in the garage, developing character and flavor.  After those, there will be time to try our hand at sausage making, a product that can also benefit from salt, cure, and smoke.  The pigs just keep on giving!  Stay tuned for more charcuterie updates as time works its magic!        


Monday, November 12, 2012

The End is the Beginning


Autumn arrived in a hurry.  In a matter of days the temperature, which had been unseasonably temperate, plunged into refrigeration range.  Leaves began to fall with frantic intention, and the sky became gray and troubled.  It was time for the harvest.

WARNING:  WHAT FOLLOWS IS A DETAILED DESCRIPTION OF THE HARVEST OF FOUR BEAUTIFUL AND BOUNTIFUL PIGS.  THE CONTENT MAY BE OBJECTIONABLE TO SOME - IF YOU ARE NOT OF A MIND TO VIEW SUCH CONTENT, PLEASE DO NOT SCROLL DOWN.  THE DESCRIPTIONS AND PHOTOS ARE OF A GRAPHIC NATURE AND ARE INTENDED TO HELP INFORM OTHERS ABOUT HUMANE PROCESSES AND PRACTICES RELATED TO SMALL-SCALE MEAT PRODUCTION.

If you are not interested in the rest of the post, enjoy this picture of our beautiful pigs enjoying a perfect fall day in the Yakima valley (along with their chicken friends).  For the rest of the post, continue scrolling down.

If you are still reading, I will assume that you are along for the whole ride.  The harvest day was so long anticipated, fretted over, planned and plotted that it seemed strange to see it finally arrive.  Our hogs had grown a great deal.  From their small andbutton-cute beginnings back in May, they ballooned to great size and even greater appetite.  We fed them hundreds of pounds of apples and pumpkins over the last several weeks (even getting them a little sloshed on occasion on account of fermented apples).  
Our plan was to do the whole harvest ourselves, from start to finish, slaughter to freezer.  In preparation of this my brother and I did some training at a seminar of sorts put on by the good folks at Farmstead Meatsmith.  My partner in crime, Keith, sketched and salvaged and sparked together steel structures necessary for the tasks ahead.  Knives were sharpened, equipment gathered, volunteers recruited - until in the end there was nothing left but the task itself. 

Harvesting hogs in a traditional manner takes several steps: 1) the kill; 2) scald & scrape; 3) evisceration; 4) butchering (portioning).  Each step has some special tools and set-up to accomplish, and all steps benefit from a lot of helping hands.  In this way the process has built into it the potential for a community that gathers around the shared labor.

THE KILL
After spending the last five months caring for these beautiful creatures, Keith and I spent a great deal of time thinking about this moment.  We were greatly invested in making sure the kill happened in the most humane manner possible.  As with so much of traditional harvesting, pursuing excellence in this arena is not only an ethical consideration but is also a practical one, as stressed animals can potentially taint the meat.  

The ethical and the practical are inextricably intertwined, a connection that becomes immediately apparent when the caretaker is also the executioner.  Our contemporary food systems sever this connection, and we become detached consumers, not invested in the care of the animals nor confronted with their death.  For some, the moment of the kill is the hardest to imagine participating in - for us, we could not imagine handing the task over to anyone else.

The pigs were killed in the paddock that they called home.  They were given a meal of cracked corn and apples which they attended to with great enthusiasm.  Keith then lined up a shot with a .22 rifle at point blank range.  The target is a specific spot on the front of the head, taking advantage of a thin spot in the otherwise impenetrable skull plate.  The shot renders the pig senseless - immediately after the shot a small team rushes in to accomplish two important tasks.  The first is to "stick" the pig, a knife is inserted at the base of the neck, angled up to nick the main arteries and create an impressive flow of blood.  

This blood is collected as it flows, possessing unique culinary potential.  It must be whisked continuously while it cools to avoid turning to one large clot as it hits oxygen.  After cooling it is filtered into jars and refrigerated, so it can be used for blood sausage. Collecting the blood is a part of the commitment to make the most efficient and total use of the animal, an ethos that flows naturally from investment of time, energy and emotion required to raise them.  It is one of the most fetching qualities of the pig - it is almost totally useful as food.  Fergus Henderson's "The Whole Beast: Nose to Tail Eating" is a marvelous introduction to the odd bits that your local butcher may have neglected to tell you about.

SCALD & SCRAPE:
After the kill and blood collection the pig is scrubbed relatively clean and then cuts are made at all four feet to open up access to some amazingly strong tendons that will be used to hang the carcass during many of the processes that follow.  What follows next is sort of a watershed event in the harvest process.  There are two schools of thought on preparing the carcass for butchering - to skin or to scald, that is the question.  We opted for the more traditional and certainly more labor intensive scald and scrape, which entails dipping the entire carcass into 145 degree water for 5 minutes and then scraping the hair and top layer of skin off of the entire carcass, nose to tail.  The result is a clean tough surface which is very easy to handle during transfer and butchering, since the skin remains intact.  But the process requires a tank large enough to handle a 380lb hog (that was the size of our largest) and a means of raising and lowering the animal.

Keith scavenged an old water tank that we estimate had a total volume of about 110 gallons.  Being handy with a plasma torch and welder, he was able to create a truly deluxe scalding tank, complete with removable lid and a ball-valve for draining the tank at the end of the day.  A little bit of paint to cover up the rust and our tank was ready for action.  Keith is also handy with a fork lift, which had more than enough capacity to handle the big job we were throwing at it.  The lift allowed us to easily transfer the pigs, hung on gambrels, to the tank for scalding and to the large metal frame that Keith constructed to hold the completed sides.  Did I mention Keith was handy?

The water temp is extremely important to achieve the best scald.  A precise 145 degrees for exactly 5 minutes - there are undoubtedly many other opinions and practices related to scalding, we found that the formula above achieved the very best results.  Mistakes made here create difficulties later, so taking time to get it right is important.  One half of the carcass is scalded at a time, and when it comes out of the tank after it's soak the work must be completed at a brisk pace.  The scurf (the layer of skin that gets removed) gets scraped off, a task made easier by a unique tool called a bell scraper.  Three or four people working quickly can scrape the half down in about 25 minutes, then the pig is flipped and the other half is done.  Final touch-ups can be done with razor-sharp knives, leaving the skin as smooth as possible.

After this the head is removed and taken away to be cleaned up properly.  There are a lot of flaps and folds on the head that have to be attended to with razor and knife in order to render the head ready for roasting or carving.  The carcass is then transferred to the evisceration area for the next steps.

EVISCERATION:
Next the carcasses are opened up, using knife and saw, in order to remove the insides and divide the carcass into halves.  This is detail work requiring a steady hand - one nicked intestine can create a micro-biological mess of your meat.  Better to proceed slowly and carefully than deal with clean-up protocols.  We took few pictures of this process - but it was attended to by my brother Alex and friend Charmaine, who carefully divided the carcasses, harvesting all the usable bits from inside, including heart, livers, caul fat, etc..  The rest of the insides where bagged for disposal.  What results are clean "sides" of pork, looking an awful lot like meat - real, honest to goodness meat.  But that meat needs to be chilled before being portioned into more usable cuts suitable for a family to make use of throughout a year.  This is conveniently accomplished by leaving the sides hanging outdoors overnight, when the temperatures will drop into the upper 20's, chilling the meat to the bone and firming up the skin and fat.

The frame that Keith fabricated using scrap metal was a structure of extreme utility, accommodating all eight sides with ease.  A light dusting of snow greeted us the next morning when we arrived to pack up the sides and take them to Keith's shop for butchering.

BUTCHERING:
There is a great deal of mystery surrounding the butchering of meat.  At grocery stores, technicians in white lab coats pass to and fro through opaque doors, bringing out trays of portioned and plastic-wrapped meat marked with a barcode.  What goes on back there?  We usually aren't given much access to that part of our food production, so it is easy to imagine that a great range of technical skills and specialty tools are required to transform sides of beef, pork, or lamb into usable cuts of meat.  This is not the case.  Traditional butchering utilizes a few simple tools, consisting of a small selection of knives, a cleaver, bone saw, bone scraper and cutting boards.  That's it.  By no means do I intend here to denigrate the butcher's craft - far from it.  One thing that you learn when taking on this task for oneself is that there are cuts in the meat that require skill and understanding that are the result of long training and practice.  Yet the harvest of a family hog used to be realistically in the realm of household competencies and a little imagination, optimism, and a couple of sharp knives can fully equip you for the job of side butchery.

There are great videos at the FarmsteadMeatsmith site on the particulars of side butchery, I encourage you to go check it out if you are considering taking on the task.  We set up the garage with several work stations, a host of bus tubs, vacuum-seal bags, plastic wrap, butcher paper, and enough cutlery to outfit a samurai army.  Over an 8-hour day, all of the sides were slowly transformed into bacon, rib chops, loin roasts, shoulder roasts, hams, hocks, trotters, tenderloins, and oh, so much more.  There is a kind of mysterious multiplication that happens, the amount of meat seems to increase with every cut.  The old-hat, grocery store cuts end up being pretty boring - it is heavily marbled shoulder roasts that fire the imagination, or jowl meat surrounded by silky fat, ready for curing or the grill.

The end result is a freezer full to the brim with meat of a quality that is unmatched by anything available at the local grocer.  Many pounds of pork belly now lie curing in the fridge, on their first steps in a journey that will end in bacon and pancetta.  Hams are suspended serenely in brine buckets, slowly gaining flavor through a mysterious alchemy that will eventually see them transformed into smoked and glazed masterpieces.  Our four pigs have provided enough stores for a small army, and by that provision they have facilitated the function and fellowship of a whole community as we gathered to share in the work and enjoy the fruits of that labor.  There is much, much more benefit incurred in the whole process than simply a harvest of pork...and for that we are so very grateful.  The harvest really is a gift, one to be received with gravitas and grace.

POSTLUDE:
The whole process is a big work, as one might expect.  But it is deeply satisfying work.  We have found that our respect and appreciation for our animals has grown, as has our sense of confidence in our own ability to gain some control over the ways and means of acquiring the food that we feed ourselves, our families, and our community.  The experience of the death/harvest side of the cycle leads one to long for the birth/nurture side of things, and the mind races forward to spring, when young pigs will once again populate their big yard at the farm.  And so the end is the beginning of more plans, more dinners, more food adventures, more farm ambitions, and, of course, more blog posts!

A special thanks to: Keith, Alex, Charmaine, Trent, Nate P., Gabe, Bob, and Nate H.