Monday, December 29, 2014

Martial Sewing Arts

I've been working on a bunch of sewing projects over the past month.  Some were for the holidays, including some fleece pj bottoms for the kiddos, stuff like that.  I've been slowly working through tailored shirt patterns, learning my way around that stuff.  Got a couple of cool pattern books from Japan for Christmas, and those things have me all excited to try out shirts and jackets.  So why, you might be tempted to ask, why would I, in the middle of all of that, suddenly take up an entirely different project?  Well....in this case, I will have to plead self-defense.

For a little over two years now I've been taking karate at a local gym.  It started out as an activity for one of the kids, and twice a week I would drive her down there and sit on the parent-bench (you know the one), with all the other parents, waiting for the 1-hour class to finish.  The class was fun, my daughter was enjoying herself, which was nice.  The bench, however...well, it might not have been the Group-W bench, but it filled me with a kind of dread nonetheless.  Parents slouched on the bench, staring into their smart phones, in various states of could-be-better health.  I noticed that there was a beginner's class for adults happening at the same time as my daughter's class - it took me all of two weeks to put two-and-two together and I enrolled for classes.

Since then I've been training away, several hours a week, for more than two years.  You might know that karate, and other martial arts, uses a special outfit for training called a gi (pronounced "gee", like geek....shut it).  When I started out I got the starter uniform, a lightweight and ill-fitting piece of work, its only positive attribute being...... actually, I don't remember how this sentence is supposed to end.  Upgrading to a heavier-weight gi is a bit of a gamble, the sizing and such is always a mess since they are made out of cotton canvas, which can shrink and move quite a bit.  On top of that, they need to be sturdy (for all of that grappling and throwing around stuff) and roomy (lots of athletic movements).

I got a heavy-weight gi about a year ago, and I like it fine.  The pants are great, I really like them, but the jacket is less than perfect, especially in it's length.  Gi jackets are cut in a bunch of ways, depending on use and tradition of origin, but I have come to want a longer "apron" on mine, meaning a long jacket that hangs down to mid-thigh.  So, I took out my heavy-weight jacket and started creating a pattern from it, then altered that pattern to create something more to my liking, and a bit more fitted.

I finished the project today and will wear it to practice tomorrow night.  The gi ended up being great practice for several techniques, mostly due to the heavy-weight, sturdy construction that is required for a piece of clothing that will undergo so much use-stress.  Flat-felled seams are used throughout, a yoke piece is integrated into the shoulder area in an interesting way, several ties and gussets are incorporated, and all hems are super-reinforced.  Lots of top-stitching to do, often through several layers of canvas.  A denim needle (or two...broke one near the end) is a must, as well as a healthy dose of patience, especially when approaching seams where layers are stacked up.

The jacket will get its real test in the coming weeks, as I work out in it and see how it wears (and tears).  But I am pleased with the way the thing turned out so far...it was a big project, but came together fairly quickly and is something I can put to use right away.  I marked it with an improvised tag, working in some tartan colors along the way.  Highland colors on a karate gi!  Fusion!


Saturday, December 27, 2014

Makers' Mark

We have been having a creative bonanza here at home.  The holiday season has provided materials, motivation, and time - all the necessary ingredients for a Maker's movement.  Here are a few of the results!

Kilt Hose - knitted by Duncan

I started learning knitting maybe two years ago, a combination of necessity and opportunity.  The opportunity portion came about with a sudden abundance of wool fiber, the contributions of our little flock of sheep, shorn annually.  Anticipating this, I thought it would be nice to start learning a few ways to put that stuff to good use.  The necessity bit...well, necessity is a bit of a stretch.  But still, a man that wears a kilt now and again needs some kilt socks.  And let me tell you, good kilt hose are hard to find.  Heavy-duty, cable-knit make the best impression when showing off a Scotsman's calves.  The best quality fetch a handsome price, probably because they are hand-made gems that come right from the source, deep in the Highlands.

After a couple of starter projects (cable-knit scarf, that kind of thing), I put together a design for the socks, drawing from a variety of sources in order to get the look I wanted.  I actually produced a pair in a charcoal color, then started these in a classic creamy wool.  Then I set them aside....for like...eight months.  Then, a week before Christmas, I decided I wanted to wear them with the kilt for a Celtic Christmas Eve service we hold at the church every year.  So, I drug them out and finished them off.  They turned out great, I'm very happy with the weight and wear of them.  In the photos you can catch a glimpse of a sgian dubh (pronounced skein doo), the "black knife" that is part of a kilt outfit.  I crafted the knife, too, though it is not quite finished, lacking a proper sheath and a final polish.

AT-AT, Snowspeeder, et al - constructed by Evie

Evie had a Christmas list this year that was topped by pure awesome: she wanted a LEGO Star Wars model of an AT-AT.  Yes, an Imperial Walker, famous for stomping around Hoth in The Empire Strikes Back.  She nurtured this want for months, and, anticipating that we would make this awesome dream come true at Christmas, we primed the pump on her birthday by getting her a Snowspeeder model, complete with Luke Skywalker in pilot garb and a still-living Dak Ralter.  Having now completed both models, she is well on her way to staging complete battle re-enactments.  StarWars parents are the best parents.

Of course, I had to stage a few extra pics with these "toys", trying to capture a few movie-moments.  I think all fans will appreciate the way Luke is working his way to the underbelly of the walker.  Also, take note of the Imperial troopers as they march on the rebel stronghold.  "The shield will be down in moments.  You may start your landing."  Oh, man....so good.


Proud and accomplished builder.

He is the Special - LEGOs by Tavish

What?!?  You haven't seen The Lego Movie?!?  Well, you should - it's a fun romp for anyone who has ever played with the famous interlocking block system.  Tavish has put together a variety pack from the movie, including a Micro-Manager ("Micromanager, commence micromanagement!"), Metalbeard ("Be ye disabling of yond shield."), and Emmett's awesome construction-themed destruction robot.  He even has an angry Unikitty to complete the set!

We've also converted an old coffee table into a lego table, which is a fun staging ground for all of this creative work.  Everything IS awesome! (That is totally my jam....)


Making Believe - by Piper

All making starts with imagination, and Piper has lots of it!  This one lives with one foot in this world and one in a fantasy world - she now has a travel companion for her flights of fancy.  Her new doll, her top-line request for Christmas, even comes with glasses - tea parties for the near-sighted can now commence!


Sunday, November 16, 2014

One Leg at a Time

It's like welding.  Or carpentry.  It's just assembly, except instead of wood and glue, the materials are twill and thread.  Anyway, I don't need to justify myself to you, dear reader, by now you must know that I can't help but do for myself what might easily be done for me.  Case in point - PANTS.

I've been playing around with the new sewing machine I got for Shannon last Christmas and eventually some web surfing led me to www.threadtheory.ca.  Let me tell you, though self-making is a growing trend and online instructions are an amazing resource in the Information Age, men's sewing patterns lag far behind, remaining an obscure cul-de-sac off the information superhighway.  The good folks at Thread Theory are working to change that, producing some amazing patterns, instruction, and encouragement all in order to help poor saps like me find my way to a new pair of pants.  One leg at a time.

The pattern I selected for this first run was their new Jutland Pant, a straight-leg, relaxed fit pant that would be suitable for a heavy work pant, a jeans pattern, or even an outdoor waterproof hiking pant if someone was determined to hike in the rain.  I decided to make mine a kind of wearable muslin in a green twill with a gold facing fabric.  I have some selvage denim I have been holding onto for a bit, trying to build up skill and courage to do a couple pair of jeans.  I figured the Jutlands would be a good pants primer, and the clear instructions and pictures didn't disappoint.

I failed to document any of the process, which mostly involved late nights huddled over the sewing machine, thread and fabric bits slowly piling up around me, and occasional beer breaks while I puzzled over each step.  It took several days of on-again off-again effort, but the finished product turned out great!  The pattern includes several cool options, like reinforcements for the knees and hem, cargo pockets, etc.  I went with cargo pockets and the knee bits, and had to shorten the length of the inseam (of course) and grade the pattern for my size.

There were some challenges, too.  The flat-felled outseams turned out well, but then trying to run the top-stitches on the inseam after the leg was closed was a trial, to say the least.  Topstitching in general was always a little bit of a finicky operation, but I am overall pleased with the results.  The fly construction was a learning process, and though I was able to muddle through, I learned enough that the next run at that operation will no doubt be better.  And I had to make some alterations to the pattern, like raising the knee patches so that I they lined up on my knees and not on my shins (which meant that they fell further up the taper on the leg, which meant that the edges didn't extend far enough for the flat-fell seam, which meant the seam had to be pressed from the back to the front).  Learning to anticipate the ways in which pattern changes have downstream repercussions is part of the continuing education.

These are very wearable, and should hold together well as the construction, based upon Thread Theory's excellent guide, is very solid.  I have a shirt project to put together, but the Jedediah Pants at Thread Theory are high on the to-sew list, and I'll start studying that pattern soon enough.  Anyone wanting to stitch a pair of these together before the holidays would do well to visit the Thread Theory page and jump onboard with their Jutland Sew-a-Long, scheduled to start Dec. 1!


Saturday, March 8, 2014

New Home Construction

Spring is trying to break through, it really is.  And in anticipation of it I have been busy building boxes for bees.  Though I have utilized Top Bar hives in the past, I am changing my equipment over to Langstroth hives, for the most part, and keeping only a few Top Bars here and there for fun.  Since I have ambitions for a LOT of hives in the near future, I have been working on production methods for the new hives so I can turn out eqquipment on the cheap and when necessary.  Here's a look at five boxes and some other bits as well.

First off, we start with 1x8 pine lumber.  I grabbed four 8'ers from the local big box store and got enough for 5 medium supers, with just a few bits left over.  I like working as efficiently as possible with materials, and this counts as a win for the good guys.

After basic dimensioning, including rips and cross cuts, I run the pieces through the table saw using my handy-dandy box-joint jig.  I made this thing a few weeks ago, it works like a champ.  The ends get milled to fit together at the corners in a very strong joint that will eventually get glued and nailed.  I like working with sled jigs, they allow for some real fine-tuning and keep fingers safe when working with the saw.  I set the table saw up with a 3/4" dado blade and away we go.  You can see the stack of sides adding up.

A rabbet along the short sides is required to create a ledge that will hold frames eventually.  I use the stacked dado and created a custom top-plate for it using some oak scrap laying around the shop.  It is a cool little accessory, fits the table perfectly.  Cutting the dado on the short side, as well as planning the joint correctly, means that I can make the dado cut across the whole length, rather than stopping it and squaring out the cut.  Don't know why people bother with that, but plan after plan seems to suggest that route.

The sides then get glued up and assembled.  It's important to keep the boxes square, so I utilize no small number of clamps, including a 90 degree corner clamp and then some long ones to draw the joints together.  There are 32 nails per box, these things are not falling apart anytime soon.  But then again, they have to endure the elements as well as handle the weight they will carry when full of bees and honey.

Good jig design and careful layout means that I can bust out tight joints quickly and with regularity - it's a nice thing.

One of the little touches that I like on commercial boxes are the scalloped handholds that are set into the sides.  So I did a little research and found a handy design that can get a similar result using a skill saw.  It mounts to the finished boxes and cuts the handholds pretty neatly.  Not bad.


Making boxes is just one part of a whole hive.  Each box holds 10 frames, which the bees will use to build their comb on.  I got a bulk package with pieces for 100 frames, they have to be assembled one at a time.  But the pieces are all coming together, and soon spring will be here and all the separate bits will combine for a productive whole, much like the colonies they will house.  Looking forward to it!


Sunday, December 8, 2013

Goings on

New goings on at our affiliate blog www.harvestingathome.net where you can read all about our new book. That's right, a book, complete with all the bells and whistles! It has pages, and covers (both front and back), comes with pictures, text, and even a table of contents. Hard to beat all of that value packed into one little package! Anyway, go check out the new thing!

Monday, April 15, 2013

Shear Joy

One of the things I have noticed is that the cultural distance from activities that were once commonplace in human society has resulted in a powerful mystification of otherwise mundane tasks.  When we decided to harvest our own pigs last year, we found ourselves piercing through layers of mystery that have been erected between the average meat consumer and the source of their food.  Butchering meat, once a household skill, is now arcane knowledge, kept by disciples in white lab coats who pass quietly behind swinging doors.  What happens behind those doors?  Who knows, certainly no one in polite society should like to find out - instead, we are content to be handed individually wrapped portions, developing our specific tastes and preferences with little to no consideration of the whole from which it comes.  Even among those who raise pigs, harvesting and butchering is most commonly left to the professionals.  When striking out on our own, we found that we were flying in the face of what is now conventional wisdom.

In the same manner, when I began this new venture of raising sheep, one of the tasks that every shepherd would have taken upon him or herself is the annual need to shear the woolies, ridding them of their thick fleeces in time for lambing season and the warming of spring.  But, similar to changes in most other areas of agricultural life, when sheep raising moved from smallholdings to vast herds in corporate operations, tasks that would have been achievable by a small community were put into the hands of professionals and specialists.  And now, even among smallholders, the instinct is most often to call a professional shearer (a profession growing more rare every year) to schedule a haircut for the sheep at what one hopes will be a reasonable price per head.  For those wishing to try their own hand at it, the industrial model (using expensive mechanical shears) tends to maximize efficiency over the comfort of the animal - as a result, one gets the impression that the only good way to shear a sheep is to get it done as fast as possible.

There are other ways to do this.  Traditionally, shearing was done comfortably and peaceably using hand shears and some patience.  The goal, rather than emphasize efficiency of time, is to work well with the animal and to get a quality fleece for fiber work later.  Often these skills were learned on the job, under the watchful eye of a skilled shepherd, but in the Information Age, recommendations on tools and approaches are just a click away, and after research is done all that is left is to give it a try.  There is an old Russian saying that translates: "Repetition is the mother of learning."  - my aim was to learn to shear our own little flock, using the five sheep as five lessons in shearing.

My brother Alex had put me on to some hand shears that seemed like they would do the job right.  They are called Jakoti Shears, and let me tell you, they are, as they say in the east, "wicked shaap", they are extremely comfortable to use, and they hold an edge like you wouldn't believe.  Although they are made as garden shears, I would recommend them as a more than adequate tool for the task of shearing. They are manufactured in the UK but carried by several dealers in the US.

I started first with the lambs, and began figuring this whole thing out.  In some ways, it is just a haircut of sorts - but there are some tricks that make it work better for man and beast alike.  In order to make shearing possible, the sheep is flopped onto their backside and leans against the legs of the shearer.  In this position they are completely docile, even slipping towards sleep every once in awhile.  What follows is a kind of greco-roman wrestling match, as the sheep is gently rolled around to different positions in order to get the angles best suited to cutting wool and not flesh.  That distinction is harder to maintain than one would at first imagine - the wool is so dense, and the flesh so soft, that the line between them is sometimes difficult to discern by eye or even by touch.  But there is a feel to the thing that develops in a short amount of time and though we had to administer some minor first aid care to the long-suffering sheep, no major cuts were inflicted.

Keith and I worked our way through the first two lambs and our cutting technique began to improve.  A week later I did two more yearlings, and got pretty decent looking fleeces off both.  And finally, I turned my attention to "Mama", our bred ewe (due in June), with her impressive shaggy coat.  The lambs were easy to move around, but Mama was a different story.  Just getting her in the shed and onto the working platform we built was a challenge and it made me think about what kind of system we would need to develop next year when our flock was more fully grown.  But eventually she and I worked things out and she sat back and relaxed for her trim.  Thirty minutes later, she emerged with a daring new look, and I was able to take some pride in a beautiful and intact fleece.

The fleeces are getting washed, then the plan is to send them off to a local fiber mill for processing.  Our plan is to get a bunch of yarn back and put them to use in some knitting projects, that kind of thing.  Hopefully we'll have a lot to work with, and can hand some out to talented knitters and see what they can do!  Meanwhile, lambing season approaches and all the new learning that will come with it - Mama is ready, now, for an easy time of it with her new, sleek spring outfit.  The curtain has been pulled back, the great and powerful Oz has been exposed - shearing is a task well within the grasp of any that would care to learn to do it.  For me, there was a recognition that this ritual, a Scotsman shearing his sheep, has been repeated countless times through the ages - and I am glad to continue on in the tradition.   


Sunday, March 3, 2013

For Pet or Dinner

It was possibly the worst Craigslist ad I have ever seen.  
It read, simply: "Lambs: For Pet or Dinner.  $50."

A stock picture of some sheep, no contact information save a generic craigslist reply.  It looked bad.


 My partner in crime at the farm is my friend Keith.  He e-mailed me the ad, along with some skeptical side comments.  The Yakima Valley has some pretty sketchy farm outfits, and unfortunately that sometimes means that you see livestock dumped on the internet, oftentimes they come in questionable health and are raised in even more questionable conditions.  We had been keeping our eyes out for some sheep in order to start up a small flock that we want to keep at the farm - this didn't seem like a very likely answer to our hopes.


But still....it was worth at least a reply e-mail right?  So I shot off an e-mail that had a couple of questions in it and my phone number.  An hour later I got a call and all concerns were laid aside.  We had hit the jackpot.


I'm grateful that the owner of these beautiful sheep had asked her adult son to place a craiglist ad for the sheep....and I'm grateful that he put almost no effort or thought into it.  What we found was an absolutely beautiful farm home to absolutely beautiful sheep - 60 head of Cormo, which were managed for their wool.  The lambs were 8 months old or so, in perfect condition.  It didn't take much chatting to find that the owner was more than happy to be selling the sheep to some young families with an interest in getting started and soon we were talking about what we would be able to take home.


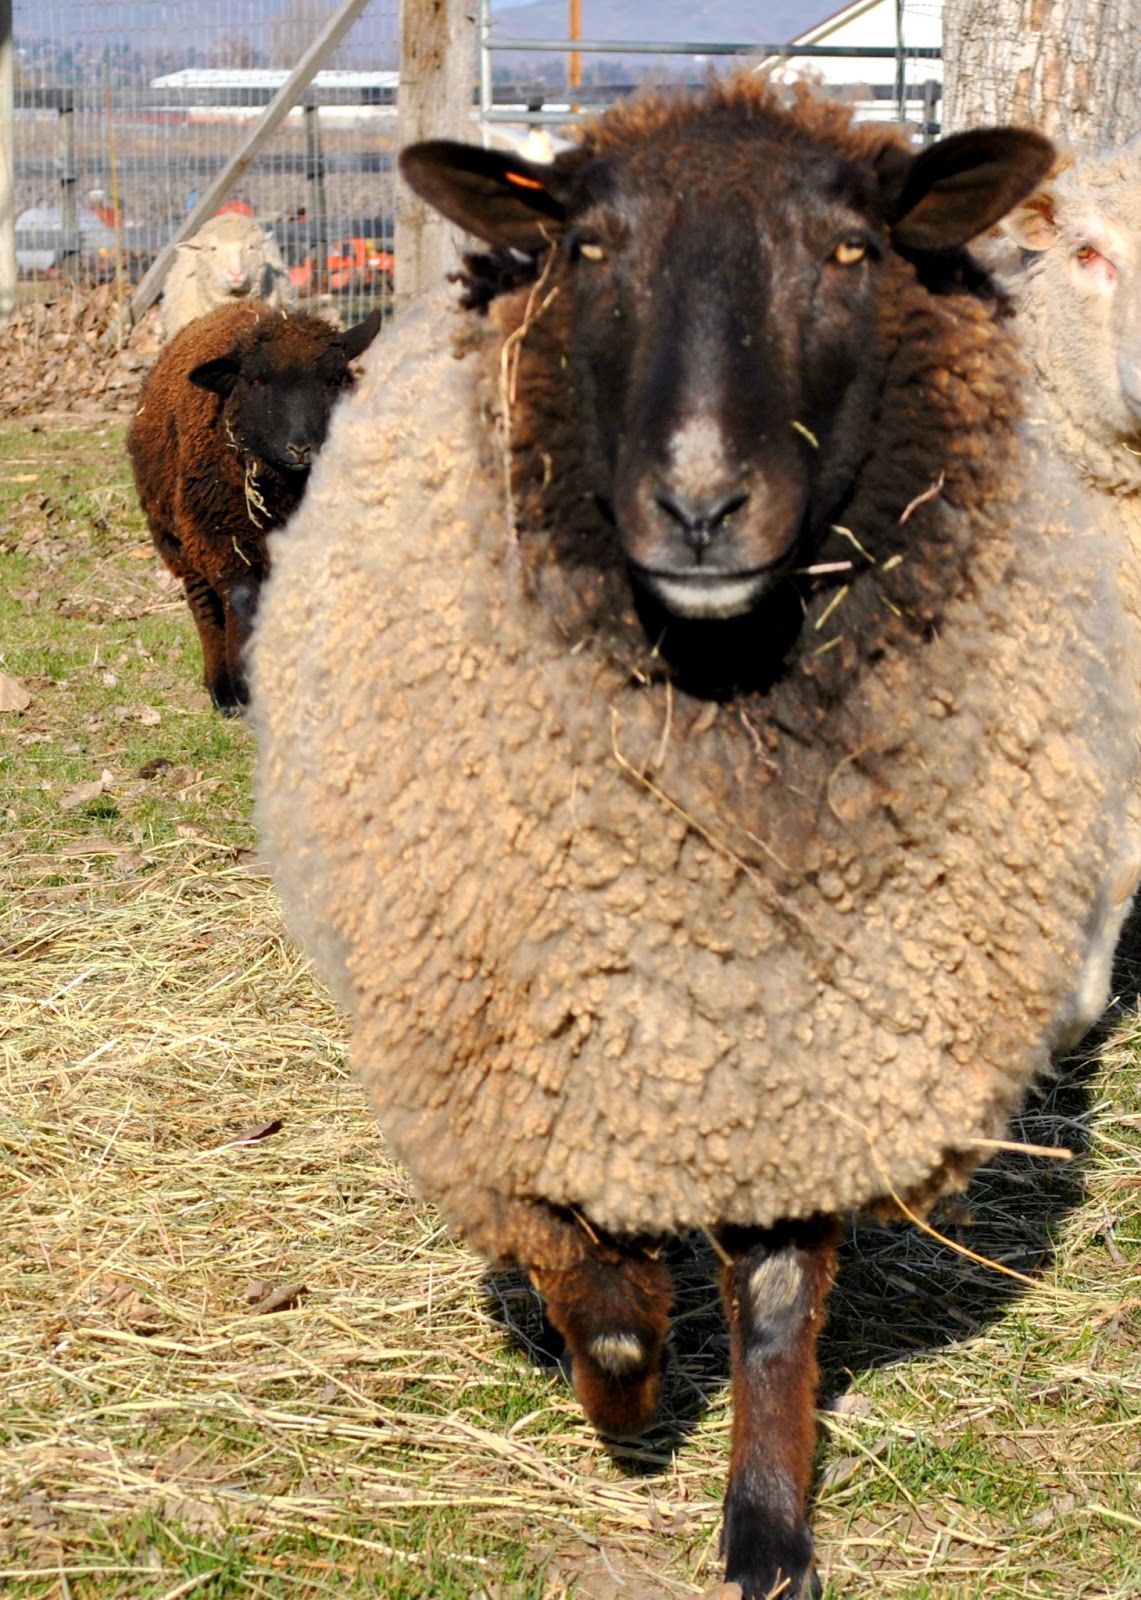
We ended up agreeing on four sheep - three lambs (2 ewes and a wether) and a pregnant ewe that was due in June.  This would give us a nice starter flock to work with.  I put money down on the spot and arranged to pick up the sheep later in the week, giving us time to get the farm ready for their arrival.  We had a couple of fencing issues to address, a shelter shed to get ready (the resident horse had moved out several months earlier) and a few other sundry details to attend to.  When we arrived to pick up the sheep, the owner gave us an additional ewe as a "bonus"....and so we came home with five beautiful, wooly creatures.
We were told it would take a little while for them to warm up to us.  It took about 4 hours and a  handful of grain.  The sheep are a fantastic addition to the farm - they seem to love their new accommodations, they follow us around as we work, and their wooly fleeces hold the promise of all kinds of projects in the year to come.  In just a few months we will happily add more to their number as the pregnant ewe delivers at least one (maybe two!) little ones to add to the happy crew.

So, this MacLeod is standing in the footsteps of his ancestors.  A tender of flocks, a mender of fences, and a shoveler of #*@!.  All transferable skills.  Say hello to the golden parachute - it's a woolen parachute, which means it still insulates, even when wet.  Just be careful how you wash it.

Chewy - our wether.
Lily - the shy one.

Mama - bringin' the babies.
Cuddles - truly tame.

Cocoa - our bonus lamb.